How to Tell Your Hens Apart (Without Losing Your Mind!)
Ever stared blankly at your flock, wondering if that’s really Beatrice pecking near the coop, or just her sneaky doppelgänger, Bertha? If your chickens look more like identical feathered clones than individuals, you’re not alone! Keeping track of who’s who is crucial for monitoring health, egg production, breeding, or just knowing which hen is sneaking into the nesting boxes she shouldn’t be. Luckily, marking your chickens is a simple and effective solution. Here’s your guide to becoming a poultry identification pro:
Why Bother Marking Chickens?
Before we dive into the “how,” let’s talk “why.” Identifying individual chickens allows you to:
- Track Health: Spot the hen who’s off her feed, looking lethargic, or has an injury.
- Monitor Egg Laying: Know exactly who your superstar layers are and who might need a little nutritional boost (or retirement planning!).
- Manage Breeding: Essential for pedigrees, preventing inbreeding, and tracking which rooster is fathering chicks.
- Solve Behavioral Mysteries: Identify the bully, the escape artist, or the broody hen commandeering the nest box.
- Peace of Mind & Connection: It just feels good to know your girls individually!
Top Methods for Marking Your Chickens (From Simplest to Most Permanent):
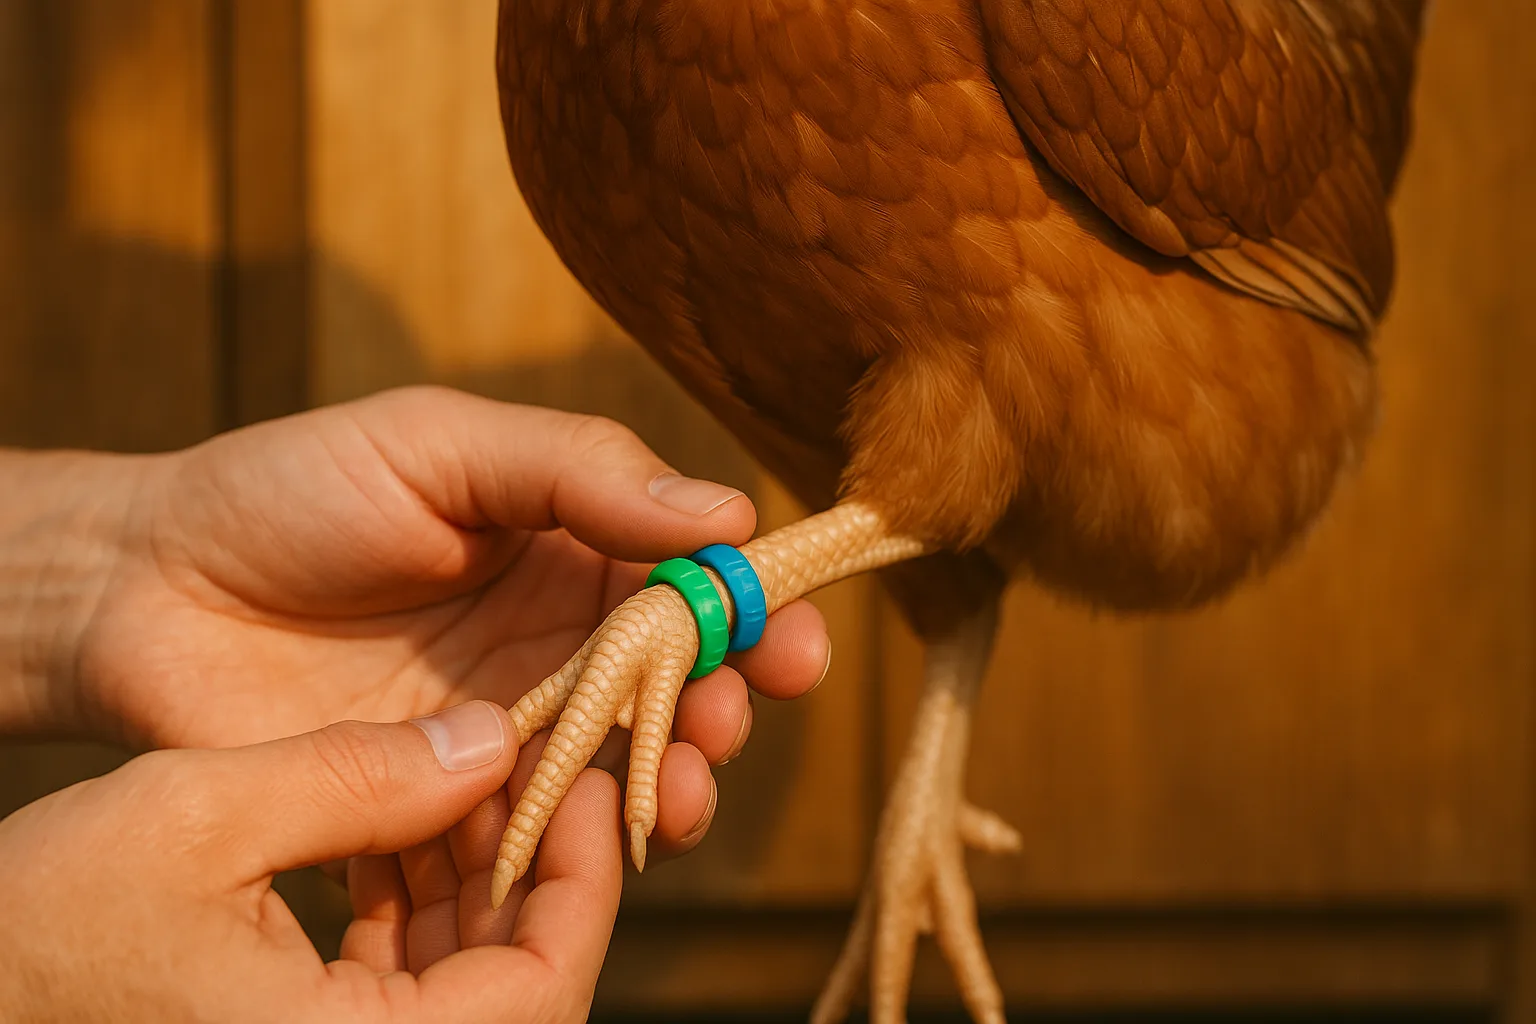
1. Leg Bands: The Simple & Popular Choice (My Top Pick for Most!)
- What They Are: Colored plastic or aluminum rings that slip onto the chicken’s leg (specifically the shank/tarsus, above the foot).
- Types:
- Spiral Bands: Twist onto the leg. Super easy to apply and remove. Best for growing pullets (check fit often!) or temporary ID.
- Clip/Snap Bands: Snap closed. More secure than spirals but still removable. Great for adults.
- Rivet Bands (Aluminum): Permanently closed with a special tool. Very secure, often numbered. Ideal for long-term ID or showing.
- How to Use: Simply choose your colors and/or numbering system! Assign a color per breed, hatch group, or use numbered bands for true individuality. Apply to the clean, dry leg. Always ensure you can fit a finger between the band and the leg – it needs to be loose enough not to cut off circulation but snug enough not to slip off easily.
- Pros: Inexpensive, widely available, easy to apply, highly visible, non-invasive, huge variety of colors/numbers.
- Cons: Can occasionally snag (check regularly!), plastic can fade or crack over time, very rarely a chicken might figure out how to remove a snap/spiral band. Fit is CRITICAL!
- Best For: Almost everyone! Small backyard flocks to larger operations. Start here.
2. Wing Bands: Secure & Standardized
- What They Are: Small, lightweight aluminum or plastic bands, usually pre-printed with unique identification numbers. Applied to the wing web (the flap of skin between the main wing bones).
- How to Use: Requires special pliers designed for the band type. Gently spread the wing, position the band around the wing web, and clamp it securely closed with the pliers. It should be snug but not tight enough to cut or restrict movement.
- Pros: Extremely secure and permanent (if applied correctly), allows for unique numbering, standard practice in hatcheries and research.
- Cons: Requires specific tools, slightly more involved application process, less immediately visible than leg bands (you need to lift the wing), potential for injury if applied incorrectly or if the band is damaged later.
- Best For: Breeders, hatcheries, larger flocks needing permanent unique IDs, show birds where leg bands might not be allowed. Best applied to day-old chicks or very young pullets.
3. Non-Toxic Markers or Spray: The Temporary Fix
- What They Are: Specifically formulated, animal-safe livestock markers or sprays (like those used for sheep).
- How to Use: Gently hold the chicken and apply a small, distinct mark on easily visible feathers – the back, wing, or tail feathers work well. A dot, stripe, or initials are common. Reapply as needed after molting or if it fades.
- Pros: Very quick, non-invasive, inexpensive for short-term needs, great for distinguishing groups temporarily (e.g., during integration).
- Cons: Not permanent – wears off and disappears completely after molting. Can look messy. Crucially, NEVER use regular human markers, paint, or hair dye – these can be toxic!
- Best For: Temporary identification (e.g., separating groups for worming, short-term breeding projects), quickly telling similar chicks apart before banding.
4. Toe Punching: A Permanent (but Controversial) Option
- What It Is: Using a specialized tool to punch a small, specific hole in the webbing between a chick’s toes shortly after hatching. Different toe combinations represent different numbers.
- Pros: Permanent, inexpensive once you have the punch, unique numbering system.
- Cons: Can only be done effectively on very young chicks (1-3 days old). Raises welfare concerns regarding pain and potential infection. Requires precision. Not easily readable at a distance.
- Best For: Large-scale commercial operations or breeders where other methods are impractical. Generally not recommended for small backyard flocks due to welfare considerations and difficulty.
5. Tattooing: For the Truly Dedicated
- What It Is: Using a small tattoo device (often used for rabbits or rodents) to place a tiny number or symbol on the inside of the wing web or leg skin.
- Pros: Permanent, discreet, allows for unique IDs.
- Cons: Requires specialized equipment and skill. Can be stressful for the bird. Risk of infection if not done sterilely. Difficult to read without handling the chicken.
- Best For: Serious breeders or show poultry enthusiasts needing a discreet, permanent mark where bands aren’t suitable (e.g., specific show classes). Not practical for casual identification.
Choosing Your Method: Key Considerations
- Your Flock Size: Leg bands or markers are fine for 5 hens. Wing bands or toe punching become more relevant for 50+.
- Duration Needed: Temporary? Use markers. Permanent? Leg rivets, wing bands, or tattoos.
- Your Comfort Level: Stick with simple leg bands or markers if you’re squeamish about wing band pliers or tattooing.
- The Chicken’s Age: Wing bands and toe punches are best for chicks. Leg bands can be used on chicks (spirals, checked often) or adults.
- Visibility: Leg bands win for easy everyday spotting.
Golden Rules for Marking Chickens:
- Safety First: Always handle chickens calmly and securely to minimize stress for both of you. Work with a partner if needed.
- Hygiene: Ensure bands, tools, and hands are clean to prevent infection.
- Check Regularly: Inspect leg bands weekly for proper fit, snags, or damage. Check wing bands periodically too. Remove or replace any problematic bands immediately.
- Use Safe Products: Only use products specifically designed and labeled as safe for use on poultry.
- Keep Records: Your color/number system is useless if you don’t write down who is who! Keep a simple notebook or spreadsheet.
The Bottom Line:
Don’t resign yourself to a flock of anonymous feathered friends! Leg bands are the superstar solution for most backyard chicken keepers – simple, affordable, and effective. Wing bands offer secure permanence for breeders. Temporary markers solve short-term puzzles.
By choosing the right marking method for your needs, you’ll transform your flock from a blur of beaks into distinct individuals. You’ll gain valuable insights into their health and habits, making you a more informed and capable chicken keeper. Now go forth and identify! (Just maybe don’t try painting their names in glitter… trust me on that one).
Got a favorite marking method or a hilarious chicken ID fail? Share your stories in the comments below!